Wednesday, 3 September 2014

Autumn/Fall Makeup

For my take on an Autumn appropriate makeup, I opted for a very dark, vampy look.
I went for a black and reddish/purple smoky eye and a burgundy ombre lip.
For a base, I'd say a matte finish is more appropriate but I just can't resist adding a bit of highlight.....EVERYWHERE! So all that mattifying just goes to waste on me 
This is the look I created;
Products Used
--------------------------------------
-Nars Sumdgeproof Eyeshadow Base
-Illamasqua Compliment Palette
-Illamasqua Precision Gel Liner
-Illamasqua Eyeshadow in 'Obsidian'
-Illamasqua Liquid Liner in 'Scribe'

-Benefit 'The Porefessional'
-Nars Sheerglow Foundation in 'Mont Blanc'
-Accessorize Mosaic Bronzer
-Bobbi Brown Cream Blush
-Mac 'Soft & Gentle'

-Mac Lip Pencil 'Brick'
-Mac Lip Pencil 'Currant'


For a tutorial on how I achieved this look please check out my Youtube;

Sunday, 31 August 2014

I'm On Youtube?!

After much umm'ing and ahh'ing over whether or not I should start a Youtube channel I have finally bitten the bullet and gone for it.

I am using this channel as a way  of sharing with people what I have learnt from my training as a Makeup Artist and as a creative outlet for all the weird and wacky looks I like to create.

I have so far uploaded 2 videos; A Kylie Jenner Makeup Tutorial and A Purple Smoky Eye Makeup Tutorial


I am still learning the tricks of the trade when it comes to filming.  i.e. angles, lighting focusing etc so please bear with me as I try to grow and develop my channel.

I hope you enjoy the videos I have filmed so far and make sure to subscribe for future uploads :)

Monday, 4 August 2014

How To: The Perfect Red Lip

Red Lips are one of those things, which when done correctly can look AMAZING on anyone- It's all about finding the shade, texture and finish that are right for you. Traditionally the red lip is worn for evenings out to add a pop of colour to an outfit but over the years I've seen more and more people rocking the red lip look on an everyday basis; Going to the shops, going to work etc.

Whilst finding the right shade for you can be difficult enough, then comes the challenge of applying it. I'm going to share with you what works best for me when it comes to applying tricky lipstick shades.


I start off by applying a lip moisturiser. This helps to make the lip product go on more smoothly, and will also prevent the product flaking off later on. I use 'PETALdiLUCE Maxi Kiss Lip Contour Cream'


I will then use a lipliner (In a similar colour to my lipstick) to line my lips. At this point it is completely up to you as to whether or not you choose to over line your lips to give a fuller look or to follow your natural lip line. I used Bobbi Browns Lip Liner in 'Red' (how inventive!)
Then, I use the same lipliner to fill in the rest of my lips. This increases the longevity of the lipstick as it creates a base for the product to stick to.

After filling in my lips with lipliner, I will use an angled lip brush to apply my lipstick all over. I used a MAC lipstick called 'MAC Red'


I then use a small flat brush and liquid concealer to clean up any messy edges (MAC Pro Longwear Concealer in shade NW15) After this I use a powder to seal the edges of my lipstick (MAC Studio Careblend Pressed Powder in Light Plus)

You can choose to finish the red lip at this stage or you can apply lipgloss for a different finish.

I used a Jack Wills Lipgloss called 'Red' (again, very inventive!) I applied this with the same angled brush I used to apply my lipstick with.


Thursday, 10 April 2014

Spring Makeup Ideas

Everyone is entitled to wear their makeup however they like, but sometimes it's nice to switch it up once in a while. Now that we're in spring, it's a perfect opportunity to incorporate more colour into your makeup and to go softer on your face makeup.

Like always, it's important to ensure that you're using the right makeup for you skin type, face shape, eye colour, skin tone etc. It sounds like a lot to take into consideration, but once you find something that works for you it isn't difficult to find similar products.

Foundation
Oily Skin
If your skin type is oily the best option for you is an OIL FREE liquid foundation. The liquid formulation means that it is easily blendable and sinks into your skin easily, preventing it from sliding off throughout the day. In spring, I think that a matte foundation is best for oily skin. A sheer/satin foundation can often result in making skin look oilier and can wear off a lot quicker.
 
Rimmel Stay Matte Foundation

Normal Skin
For those of you blessed with normal skin, you can wear pretty much any foundation, however a sheer foundation is nice for spring. It gives you the coverage you want by balancing out any unevenness in your skin tone whilst still allowing your natural glow to show through. Fundamentally, a 'your skin but better' concept.
NARS Sheer Glow Foundation

Dry Skin
Like oily skin, your best bet for dry flaky skin is a liquid foundation (but make sure it isn't oil free). With dry skin, you could have the best foundation on the market, but without moisturiser on primer, your skin will continue to have a dull appearance.
Illamasqua skinbase foundation, Maybelline Baby Skin primer, Simple kind to skin moisturiser

Combination Skin
With combination skin, it is best to treat it as if it were oily. Opt for an oil free foundation that will balance out the texture of your skin whilst still giving a dewy appearance.
Estee Lauder double wear foundation

Acne Prone Skin
If you suffer with problematic skin, you need to establish what your actual skin type is. Having acne doesn't always mean your skin is oily, it could be any of the above. Once you have done this and chosen an appropriate foundation, to achieve the coverage you want, opt for a cream concealer. The creamy texture means it is high coverage and that it stays put all day.
Estee Lauder double wear cream concealer

Sensitive
A tinted moisturiser is best for sensitive skin. It provides light to medium coverage whilst supplying skin with the hydration it needs. It gives the feel of wearing nothing on your skin, but still balances out your skin tone, giving you a flawless finish.
No7 BB Cream


Makeup for your eye colour
Brown
Purples and greens are the best springtime colours for brown eyes. The colours compliment each other meaning your eye colour will exaggerate the makeup, and the makeup will exaggerate your eye colour.
This is a purple smoky eye I created 
Green
Browns look lovely with green eyes and are a nice switch up from black for spring. If you like light makeup, opt for a simple brown eyeliner flick, but if you're used to heavier more dramatic makeup, go for a brown smoky eye.
Brown and bronze smoky eye I created
Blue
Soft pinks and purples compliment blue eyes beautifully and really makeup them pop. I would recommend using a brown or black to softly line lashes though to prevent your eyes getting lost in the pastel shades.
I love this makeup by Lauren Curtis. You can check out her youtube here
Hazel
As hazel is a mixture of green and brown tones, you need to decide which you want to pick up more. If you want to show off the brown flecks in your eyes, use soft greens and purples, and if you want to accentuate the green in your eyes, go for soft browns/bronzes/golds.
Soft brown smoky eye I created


Wednesday, 9 April 2014

Makeup Of The Day

So this is what my face looked like today...
I opted for a subtle purple and brown smoky eye with a softly bronzed cheek and a peachy/red lip.


For this makeup look I started off by doing my brows-I went for a slim arched brow in a medium brown
Illamasqua Eyebrow Cake in Thunder

I then contoured my face, focusing on highlighting my under eye area
(This is not actually from today as I was stupid and forgot to take a photo, but this is pretty much how I always contour)
Illamasqua skinbase lift in white light and Illamasqua skinbase foundation in SB14

After this step, I buffed in my foundation. I like to use a blotting technique on the highlighted areas, and a circular/rubbing technique on the contoured areas.
Estee :Lauder double wear foundation in shade Extra Light
I then powdered my face with Guerlains meteorite 'perles'. These are different coloured powdered balls designed to balance your complexion. (green-diminish red, purple-disguise yellow, bronze to add a healthy glow and blue to counterbalance any orange tones from the bronze)

Next, I contoured my cheek bones with a powder bronzer and applied some blush.
(Yes, I know this picture is further along in the makeup but once again I forgot to photograph that specific step)
Diorskin Nude Tan bronzer in 003 and Bourjois blush 37 'Rose Pompon'

For the eyes I started off by applying a nude coloured primer
Illamasqua cream pigment in hollow
I then worked a purple shade into my crease, slightly up onto my browbone, and under my lashline
Illamasqua paranormal palette 'Trance' and Illamasqua fatale palette 'Charm'
To add more depth, I went over the colour on my brow bone with a slightly darker, more raspberry shade
Illamasqua Fatale Palette 'Ensnare' 
After this I patted a glittery brown pigment onto my lids. I find the patting technique works best to ensure as much colour payoff as possible.
Illamasqua pure pigment in Fervent
To give a smokier and slightly more dramatic look, I tightlined, waterlined and lashlined my eyes with a brown kohl pencil
Jack Wills kohl pencil in Brown (how very inventive of them)
To complete my eyes I curled my lashes and applied mascara
(this was originally supposed to be a video so enjoy some screenshots of me doing this)


To achieve my lip colour, I first lined my lips with Bobbi Brown lipliner in 'Red' (again, very creative) and then applied MUA lipstick in shade 7

And VOILA....this was the finished look


Monday, 7 April 2014

Illamasqua Crazy

Illamasqua is by far my favourite makeup brand. I love their versatile range of products; the vibrant colours, the different textures, how they can be used in so many different ways...(I could go on and on). Not to mention their packaging is absolutely devine. An Illamasqua product could be used to create any type of look from a
Natural everyday look
To a whacky Avant Garde look
Or even a special effects look

As a makeup artist, Illamasqua is a vital part of my kit. My collection is huge for somebody who doesn't actually work for illamasqua. (Thank god for 20% discount!)

I use a lot of the basics on myself everyday such as the Skinbase Foundation (shade 3.5 mixed with 01), Cream Pigment in Hollow, Eyebrow Cake in Thunder, Precision Gel Liner in Infinity, and i'd be absolutely lost without my Illamasqua brushes!

Many people rave about the skinbase foundations and they are 100% worth the hype. They have a perfect silky consistency but still have good coverage without looking too heavy. The wide range of colours (26 shades!) means they can be mixed to find the perfect match for you or a client. Most importantly this products stays  put all day (even without a setting powder) and the SPF 0 means you won't get any horrible white flash back from flash photography. I own 5 shades from the skinbase line and have ever been unable to achieve a perfect skin match.
Another one of my absolute favourite Illamasqua products is the eyebrow cake. Like the name suggests it is a cakey formulation, however, once applied it turns into more of a powder. The product is available in a range of different colours but I own one (Thunder) and I think that suits pretty much everybody.
(Also pictured is the eyeliner cake in mislead and the sealing gel which is amazing for mixing into either of the products to create a stronger, more defined look) 
Here are some of the different brows I have created with the eyebrow cake.
Natural soft brow

Soft curved brow

Strong defined brow

Natural, yet defined brow

Softly arched brow
Another must have for my everyday makeup look (although that is forever changing) is the precision gel liner
Shade Infinity
This eyeliner is a gel formulation and not only is it the largest pot of eyeliner available on the market (5g) it is also the blackest (pretty awesome). I love this eyeliner to create a classic hollywood glamour flick, a dramatic flick, or even as a base for a dark smoky eye. And let me tell you this eyeliner isn't going anywhere! I struggle getting this off at the end of the day (but hey, that's what you want during the day, right?) 
Here are some looks I have created using the precision gel liner
Colourful 80's look with a black flick

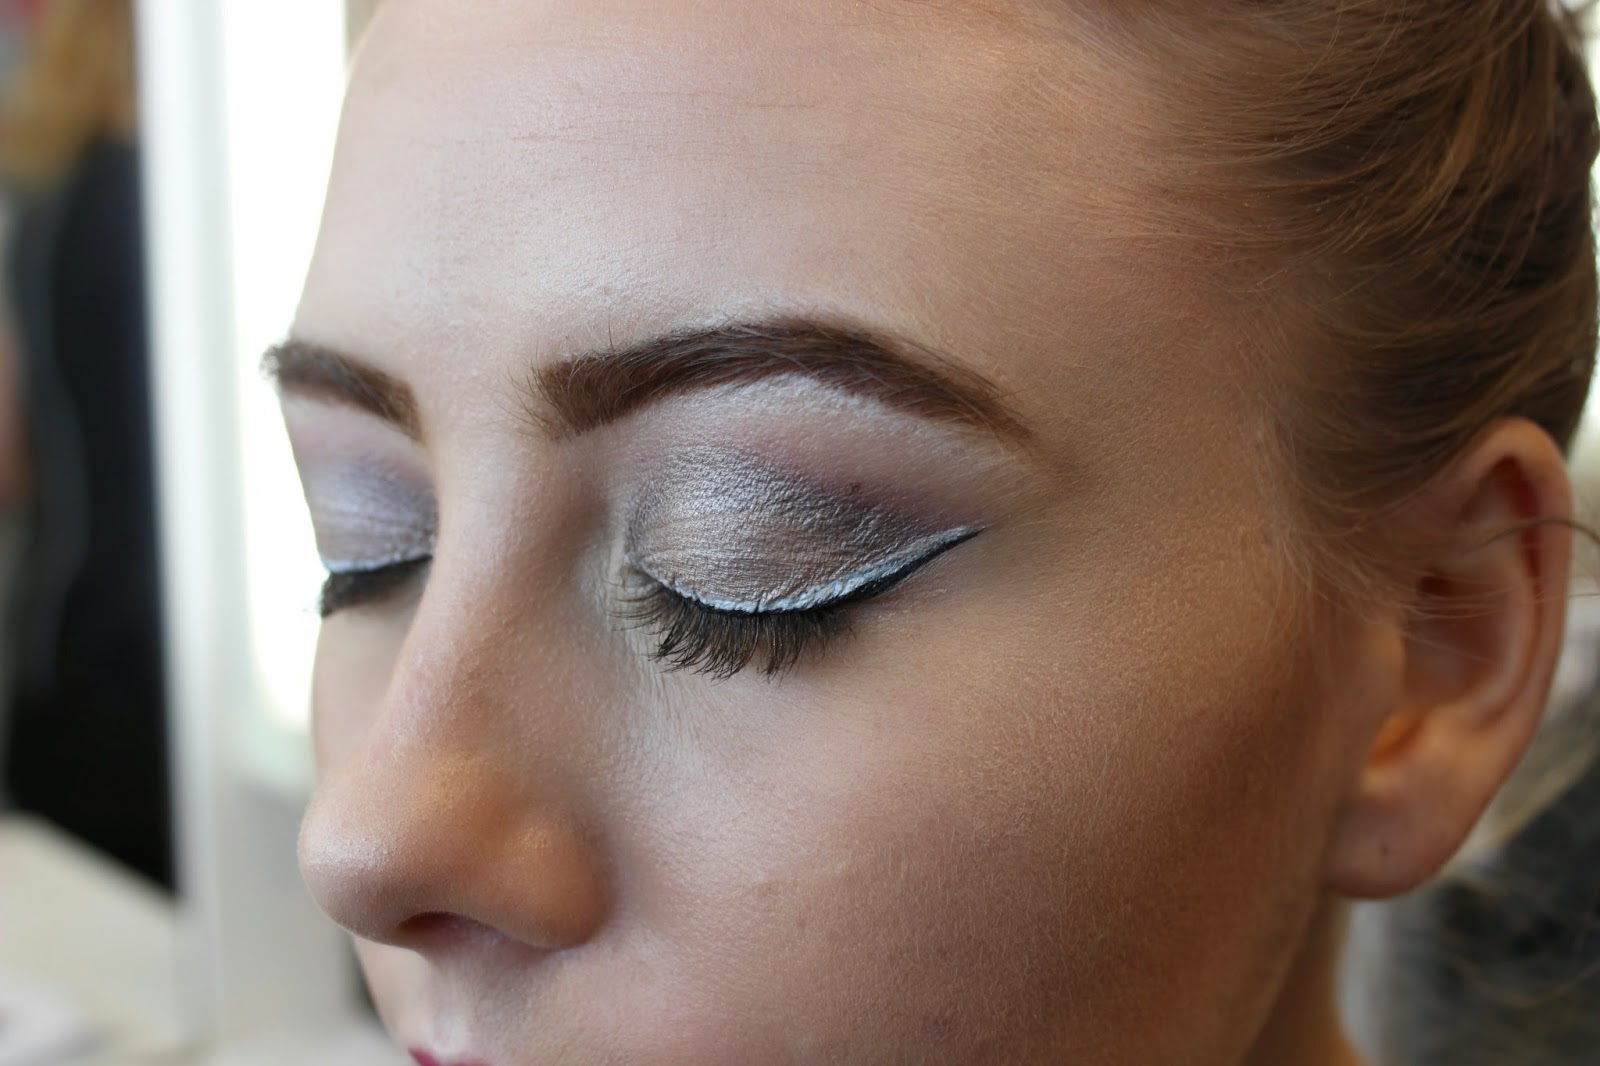
Black and White contrast flicks

Horror photoshoot; branches created with black liner

Purple and gold prom makeup with black flick

Brown smoky eye with black accents


My Makeup for today


Illamasqua also sell eyeliner in other amazing forms; a liquid liner and a kohl pencil
Here is a swatch of the ones I own

From top to bottom; Illamasqua Medium Pencil in Elate, Illamasqua Precision Ink in Scribe and Illamasqua Precision Gel Liner in Infinity.

Back to one of my first points, Illamasqua offer products in some crazy and insane colours but they are all amazingly pigmented. Their eyeshadows, in my opinion are the best available and I wouldn't use another brand for mattes, shimmers, warms, cools, nudes, brights etc. the shadows are available in singles and in quads.
From left to right; Fame, Obsidian, Apex, Imagine

From Left to Right; Compliment Palette, Paranormal Palette, Fatale Palette


 Compliment Palette With Swatch


Paranormal Palette With Swatch


Fatale Palette With Swatch


Singles With Swatch


As a base for my eyeshadow I love using Illamasquas' cream pigment in Hollow


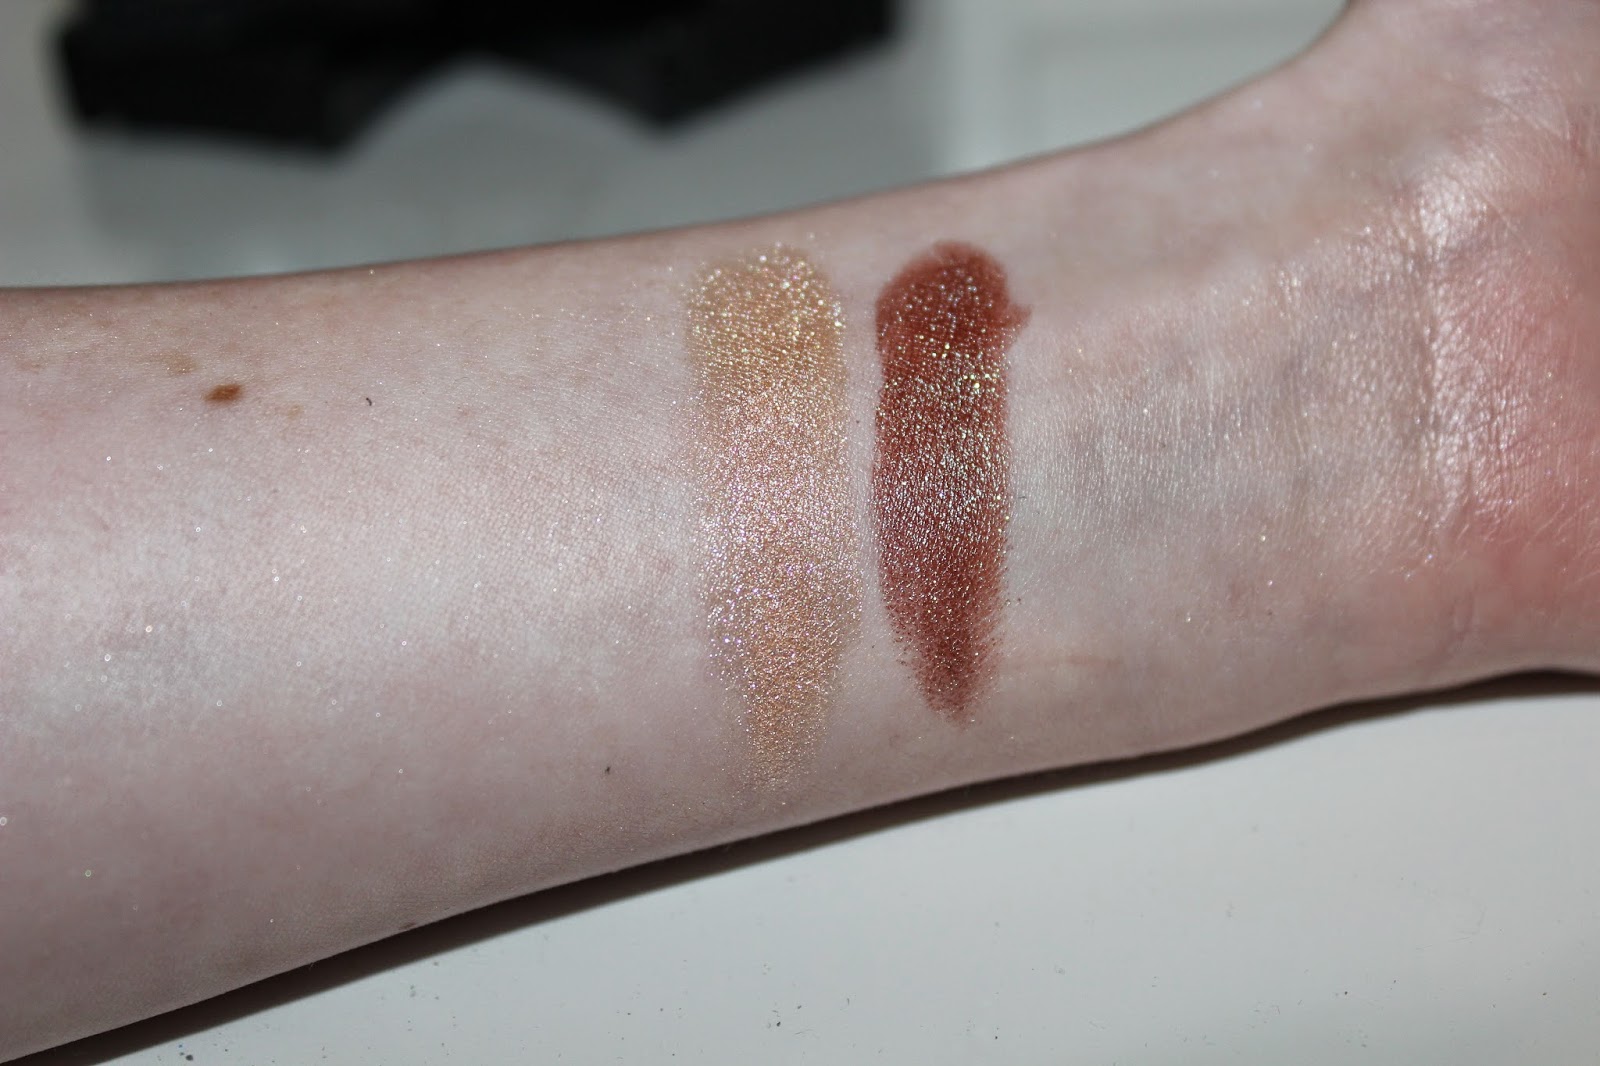
My other favourite Illamasqua products to use for creating eye looks, are their liquid metals and their pure pigments. I own two of each product;

Liquid Metals in Surge and Resolute


Pure Pigments in Furore and Fervant


To finish off my regular makeup looks I will;
Apply lashes ( I'm absolutely in love with these ones because of the hint of purple in them) The glue provided by Illamasqua is also latex free so a lot safer and problem free for those with allergies.

Conceal (I use shade CC135 on my problems ares and skin base lift in white light under my eyes and around my brows for highlight, radiance and definition)

Contour and highlight (The sculpting duo by illamasqua is literally the best thing ever. The bronzer is the perfect shade for most skin tones and has absolutely no orange tinge to it so it looks 100% natural. The highlighter is also brilliant, its soft and shimmery, and sits beautifully on the skin)

Illuminate (I like to use Gleam in supernatural just above my bronzer on my cheekbones to look sunkissed and bronzed)

Lipstick. I only own two Illamasqua lipsticks in shades pristine and howl but this is due to me being quite an advocate for MUA lipsticks. However, the ones I do own go on beautifully and do stay put for a good length of time. I love mixing pristine with other shades of lipsticks to darken  them up and give my makeup more of a vampy feel.

To apply my Illamasqua products I use the most amazing brushes in the world.


I own the highlighter brush, blusher brush, blush up brush, eyeshadow brush, blending brush, angled brush and lip brush.

The Illamasqua brushes feel amazing on the skin, pick up product well (without trapping it all the brush and wasting it), are durable, wash easily and apply makeup beautifully. Although every single brush is brilliant my favourites by far are the angled brush and the blending brush. However, when it comes to the face brushes I rarely use them for their intended purpose. The highlighter brush is used to apply my moisturiser and primer, the blusher brush is used to buff in my foundation, the blush up brush is perfect for powder contouring with the sculpting duo and I sometimes use the lip brush also to contour if i'm working with liquid products.

You can check out the rest of Illamasquas' amazing products here

I hope you enjoyed my first ever blog post. It didn't seem right to have all these products stuffed in a makeup kit and not share them with people and let them know what they're missing out on :)